

The sign of a great pattern is the ability to reimagine it in new and different ways. What I didn’t expect when working on this pattern hack of the Qualicum jumpsuit though, was for the finished garment to be such a difference from the original pattern. Who knew 3 changes would result in what might be my new favourite garment.

Zipper Tutorial
The first change I made to the pattern was to switch out the button placket for a zipper. Small change that has big impact, plus I think it adds a bit of oomph to the garment. You need a 20″ zipper for this step.

Start by following the first 7 steps in the pattern.
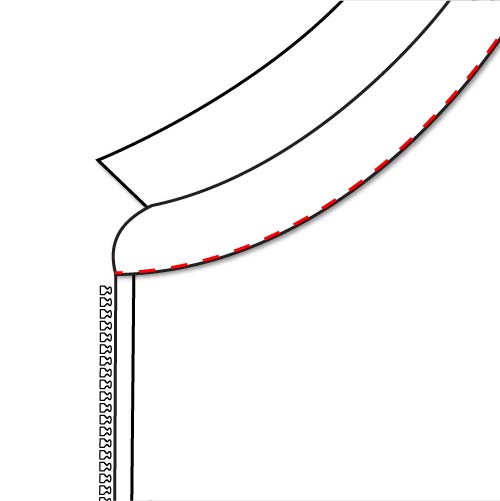
- Working from the right side, staystitch the center front notch by stitching 3/8″ from the inside raw edge. Make sure to sew across the bottom of the notch.
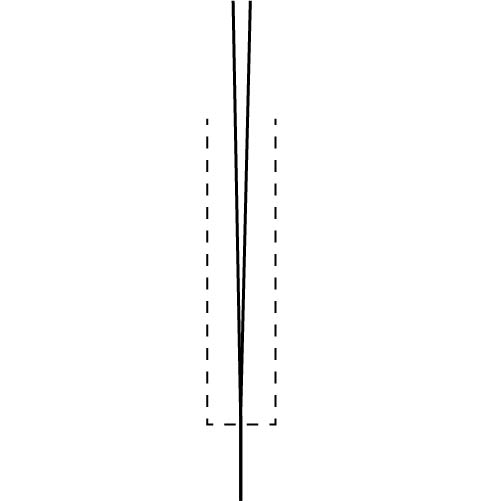
2. With the zipper face down and pointing towards the bottom of the jumpsuit, sew the zipper to the jumpsuit along the horizontal line sewn in the previous step. Lock stitches on both ends and make sure not to extend beyond the vertical stitch line.
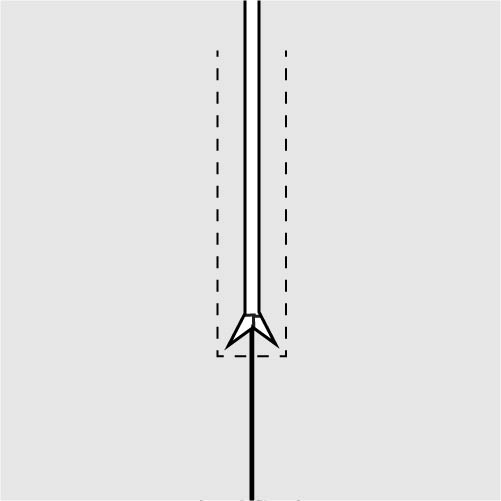
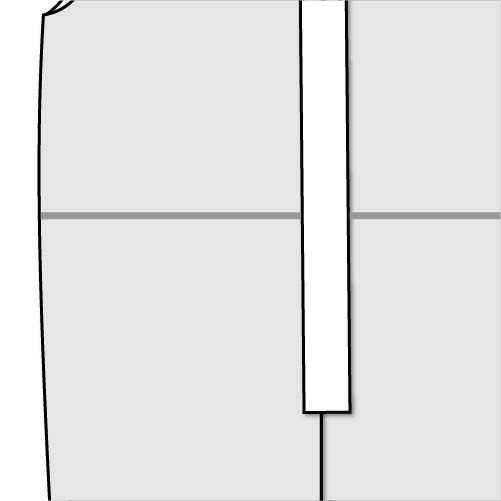
3. Cutting only the front pieces and not the zipper, clip into the corner making sure not to cut through the stitching line.
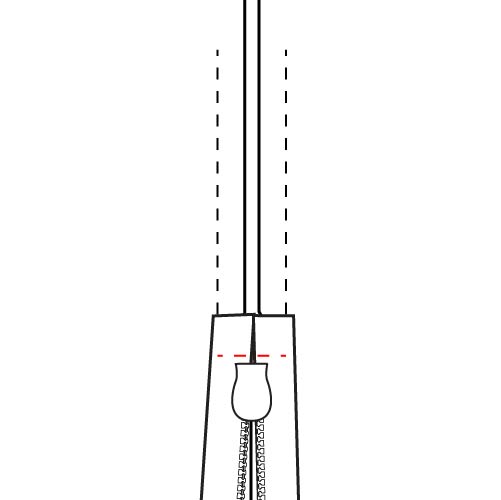
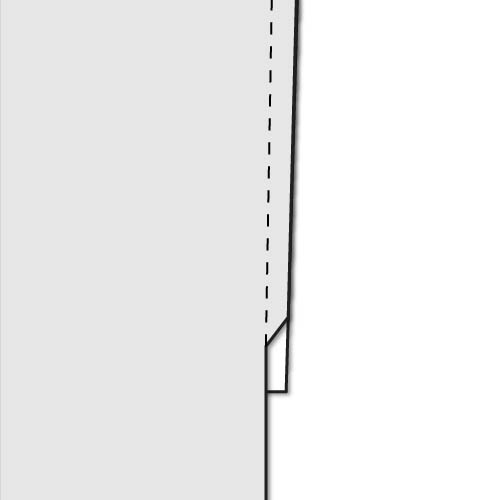
4. Flip the zipper towards the right side of the garment. With the front pieces out of the way line up the inside edge of the front from step 3 with the outside edge of the zipper tape. Starting at the bottom horizontal stitch from step 2 sew the zipper to the front with 3/8″ seam allowance. Repeat with other side of the zipper.
Collar Stand Tutorial
With the addition of the zipper I decided that a more structured neckline finish would elevate the look of the jumpsuit even further. I just love the tailored look of this change.

The pattern pieces for the collar and collar stand have been drafted for all sizes and can be downloaded through the following link.
Sew the pattern following the instructions in the original pattern until reaching step 22.
- Iron interfacing on the wrong side of one collar and collar stand piece, these are now the facing pieces. With right sides together sew the two collar pieces together along the top and sides with 5/8″ seam allowance. Clip the corners and turn right sides out. Press well and baste the bottom edge together.
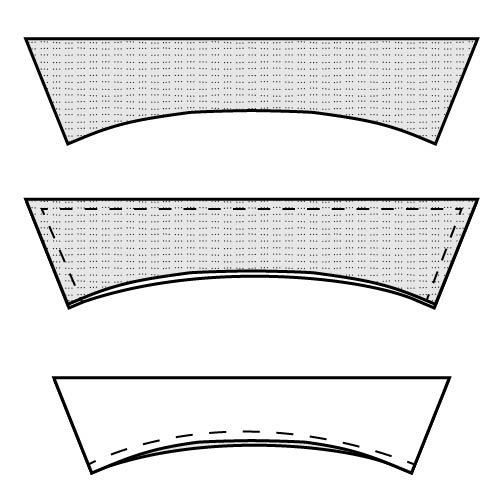
2. With the collar stand facing right sides up, place the collar with right sides down. Place the collar stand right sides down sandwiching the collar between the two collar stand pieces. Match the center back (CB) of the collar stand with the CB of the collar. Fold the bottom edge of the collar stand facing towards the wrong side 1/4″ and press well. With the fold intact, sew the collar stand pieces together along the sides and top with 5/8″ seam allowance catching the collar in the top edge. Grade the seam allowance and clip the curves. Turn the collar stand right sides out and press well.
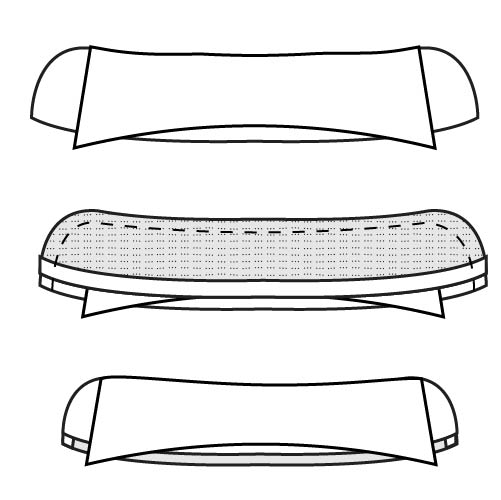
3. With the unfolded edge of the collar stand towards the right side of the jumpsuit, line up the center front and CB of the collar with that of the jumpsuit. Sew the collar to the neckline making sure not to catch the collar stand facing or collar in the stitch line.
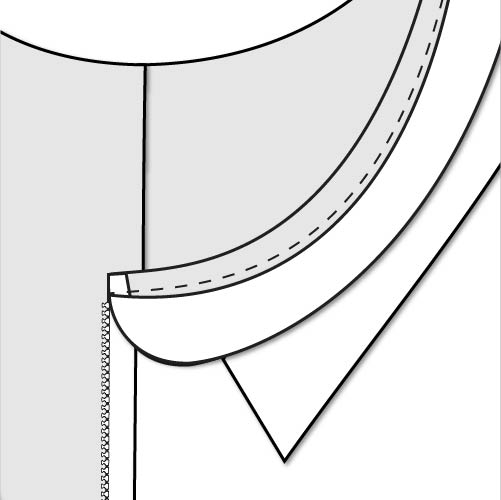
4. Press the seam allowance towards the collar and bring the folded edge of the collar towards the wrong side. The folded edge of the collar stand facing will just cover the stitch line from step 3. Pin in place.
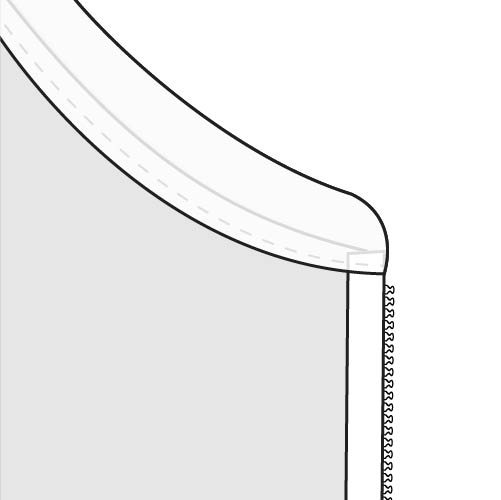
5. Working from the right side of the garment, sew the collar stand facing to the jumpsuit by stitching along the seam between the collar stand and the jumpsuit, otherwise known as stitching in the ditch.
Gathered Waist Tutorial
The final change I made to this jumpsuit was to add a simple piece of elastic to the waist to change up the overall lines of the jumpsuit. I love the original oversized look of this pattern, but man the cinched waist is so good!

- Start by putting on the finished jumpsuit. With your hand on your natural waist, mark with erasable pen or chalk where that is on the jumpsuit. You only need to mark one side.
- Wrap a piece of 2″ wide elastic around your waist at the point you marked on the previous step. Without pulling the elastic tight, cut the piece where the ends meet.
- Using the chalk mark from step 1, measure down the side seam from the underarm point to that chalk mark. Using that measurement mark the same place on the other side seam. Using a ruler, extend the chalk marks across the front and back of the jumpsuit. This line doesn’t have to be perfect so just do your best.
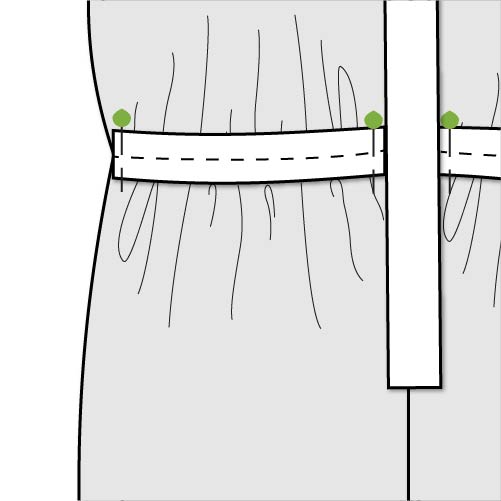
4. Working from the inside of the jumpsuit. Divide the elastic in half and pin the center point of the elastic to the center back seam along the chalk line from the previous step. Pin each short end of the elastic at the center front either in line with the zipper or placket. Finally, divide each half of the elastic in half and pin those points to the side seam along the chalk line. The elastic will need to be stitched to the jumpsuit while stretching it to fit, making sure not to stretch the actual jumpsuit. I recommend sewing this slowly and about an inch at a time. Try to keep the elastic along the chalk line as best you can. You can stitch multiple stitch lines or just a simple one down the middle, it is completely up to you.
If you made it all the way through this tutorial I am impressed, it is basically three tutorials in one! If you haven’t already done so, grab your copy of the pattern in my shop today and keep your eyes peeled for the full video sew along coming the middle of June.
Happy Sewing!
Kimberly