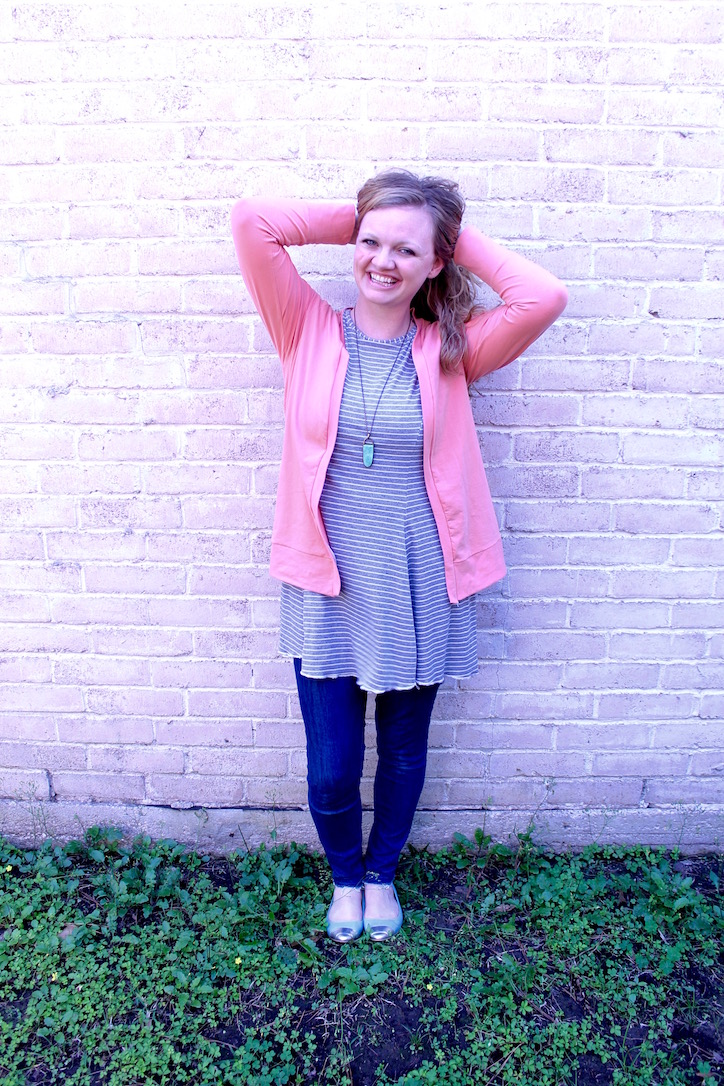
Hi! I’m Terri from, Blue House Joys, and an avid pattern tester for Kimberly here at Straight Stitch Designs.
Last year while testing for her View Ridge Pattern I shared a little pattern hack for busty gals that my mom had passed down to me when I started sewing my own wardrobe, and she asked if I would share it for her readers to use on her newest pattern, The Phinney Ridge Cardigan.
The first time I tried to use a pattern I took my measurements, found where I fell on the sizing chart and just assumed it would fit perfectly…wrong! The shoulders were so broad that they were falling off of me and the back had way too much extra room in it.
You see patterns are often drafted for a B cup, occasionally C cup bra size. If you are a D cup or higher your bust measurement is going to make you think you need a larger size than you probably do. What you really need is that extra room across the front bust and a smaller fit in the shoulders, back and neckline.
So how do we achieve that? I took a few photos to help me explain.
First take your high bust measurement. This will be a tight measurement around your upper back, under your armpits and across the top of your chest. Write that number down.
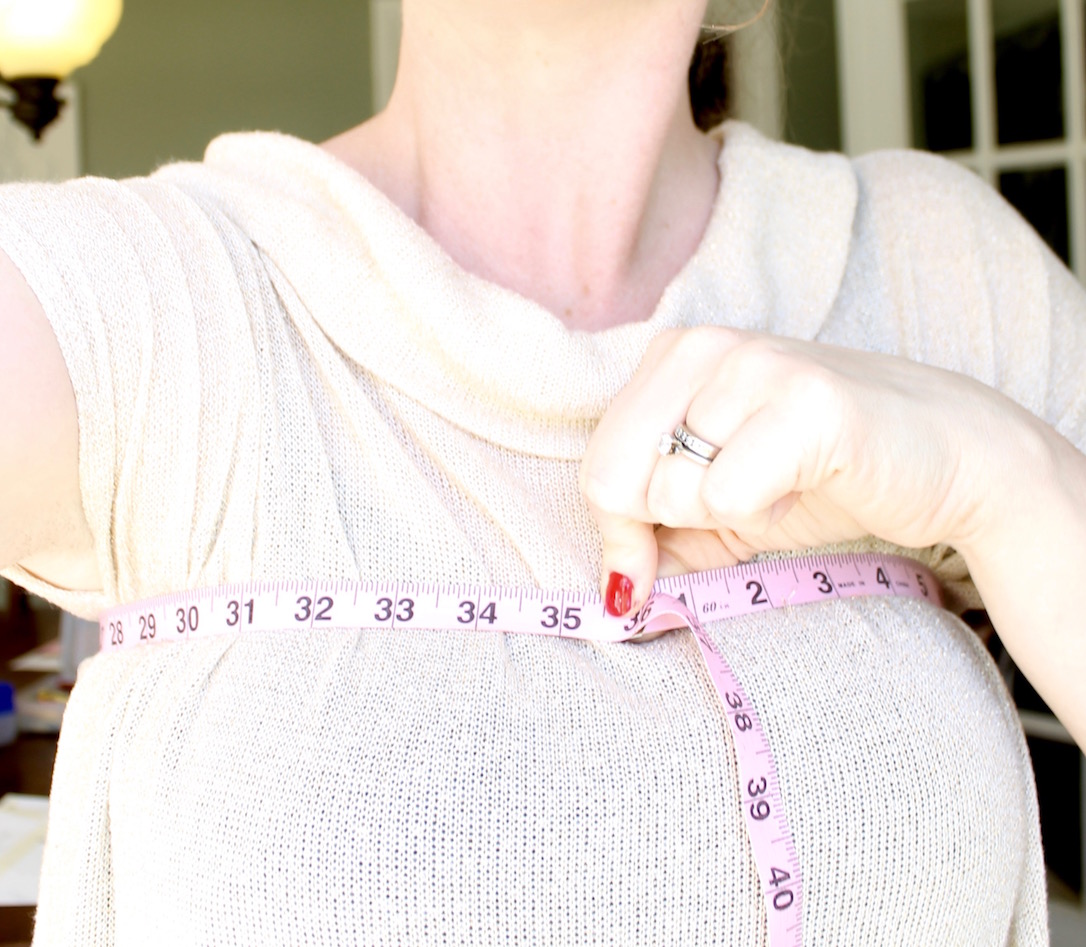
Next take your full bust measurement. You want this to be around the fullest part of your chest and snug but not too tight. Write that number down.
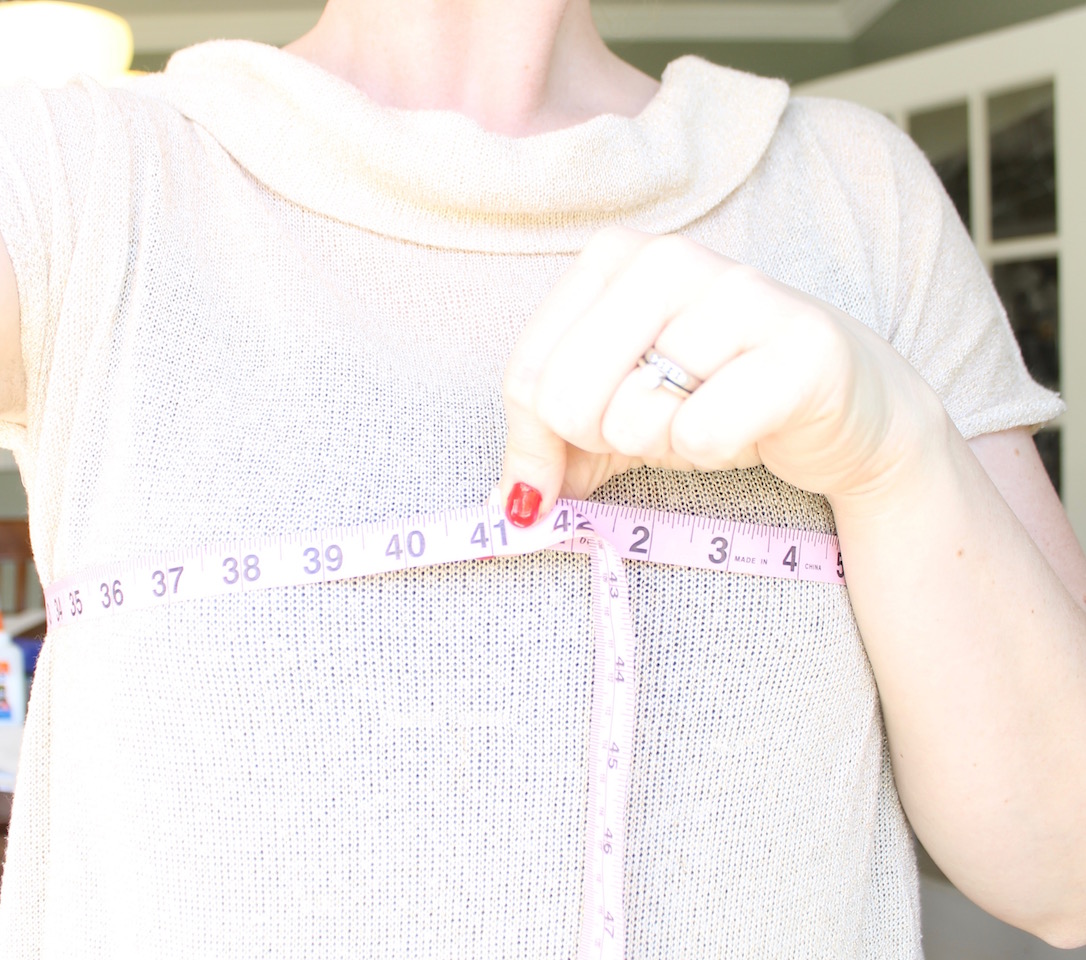
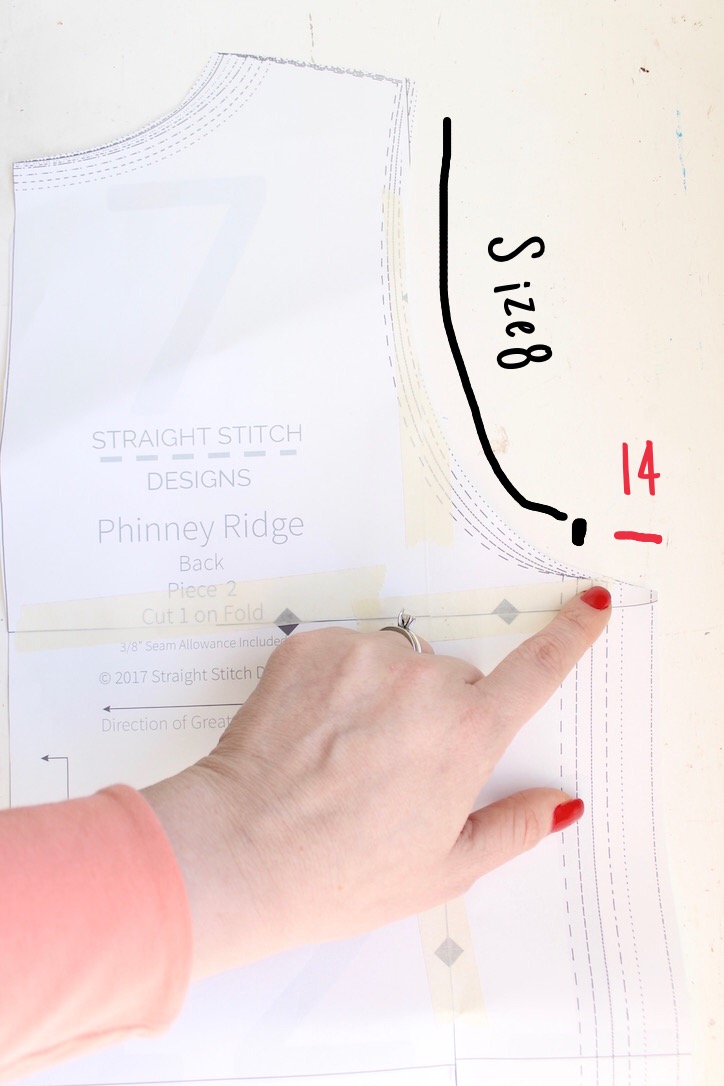
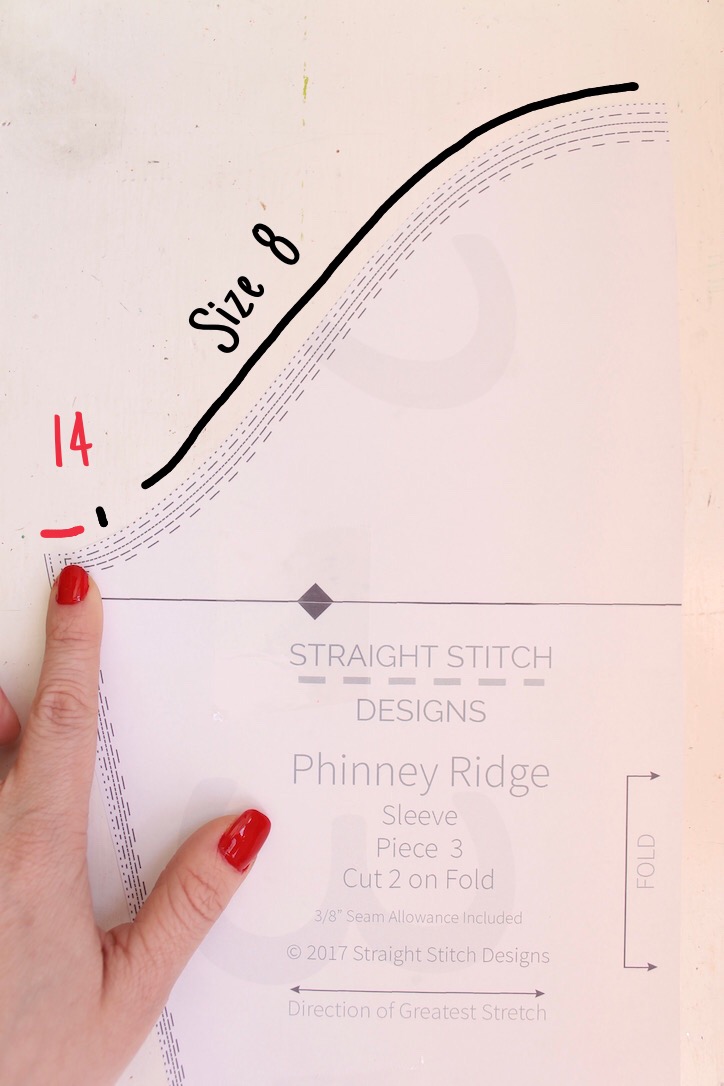
Now find your measurements on the sizing chart for the pattern you are making. Here I would fall into a size 8 for my high bust and a size 14 for my full bust.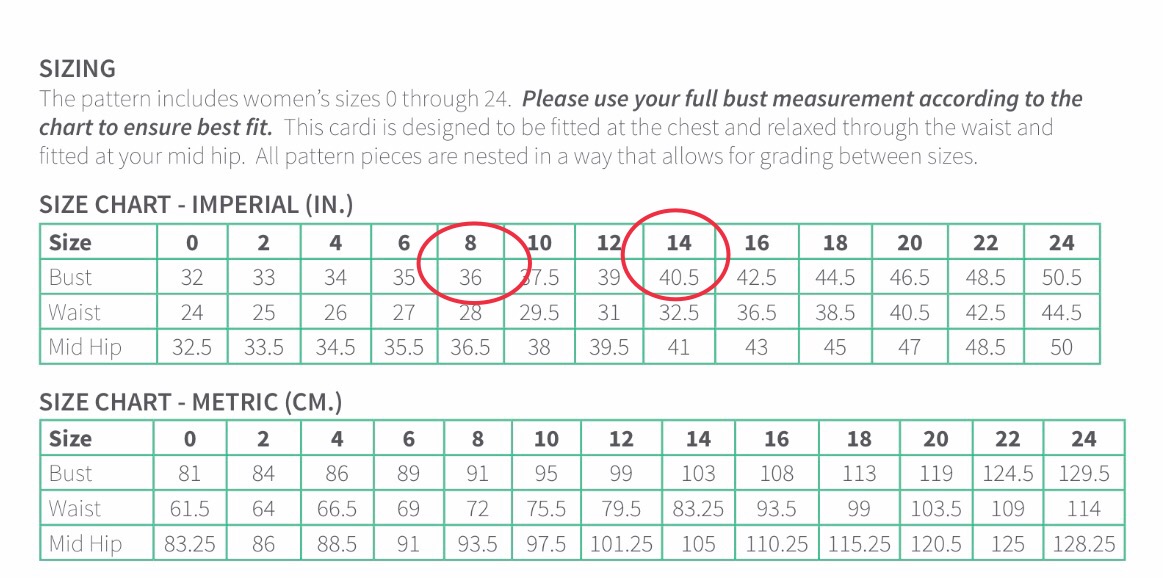
Full Disclosure: If this were a pattern meant to be made with a non stretch woven fabric then I would typically cut a smaller size for the back (like an 8 or 10, and then probably one size bigger for the front, like a 16) but since it is meant to be made with a knit fabric and you are guaranteed to have stretch I just went with my full bust size for the front and back and my high bust for the shoulders, armscye, and neckline. In the end it came out great and I wouldn’t change a thing.
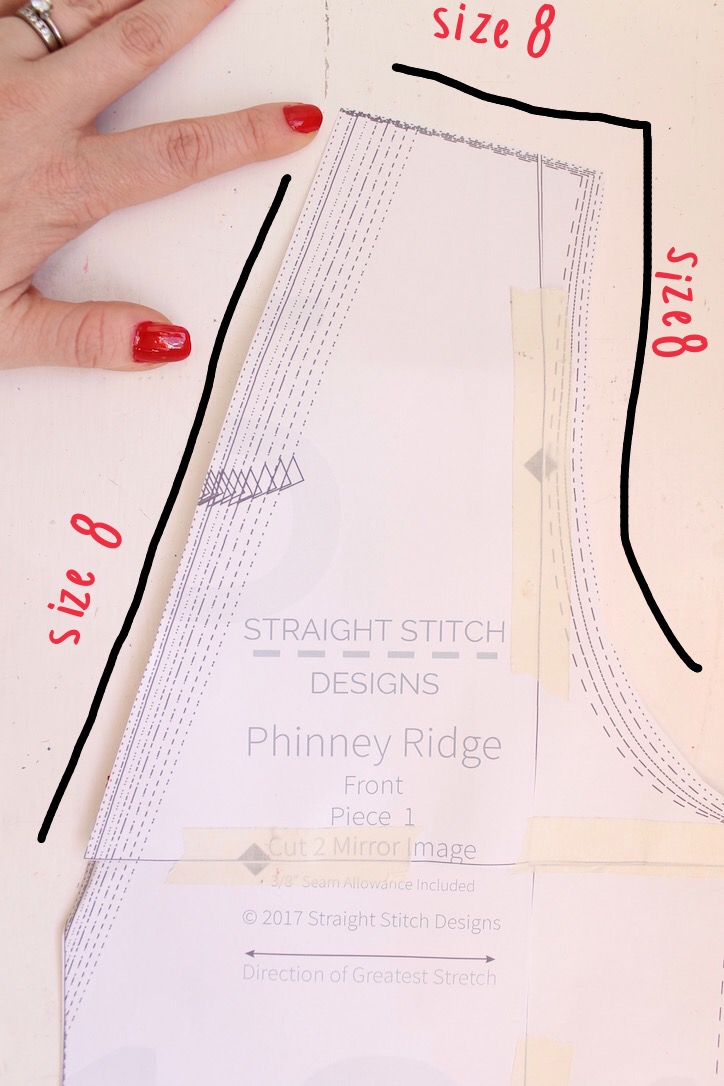
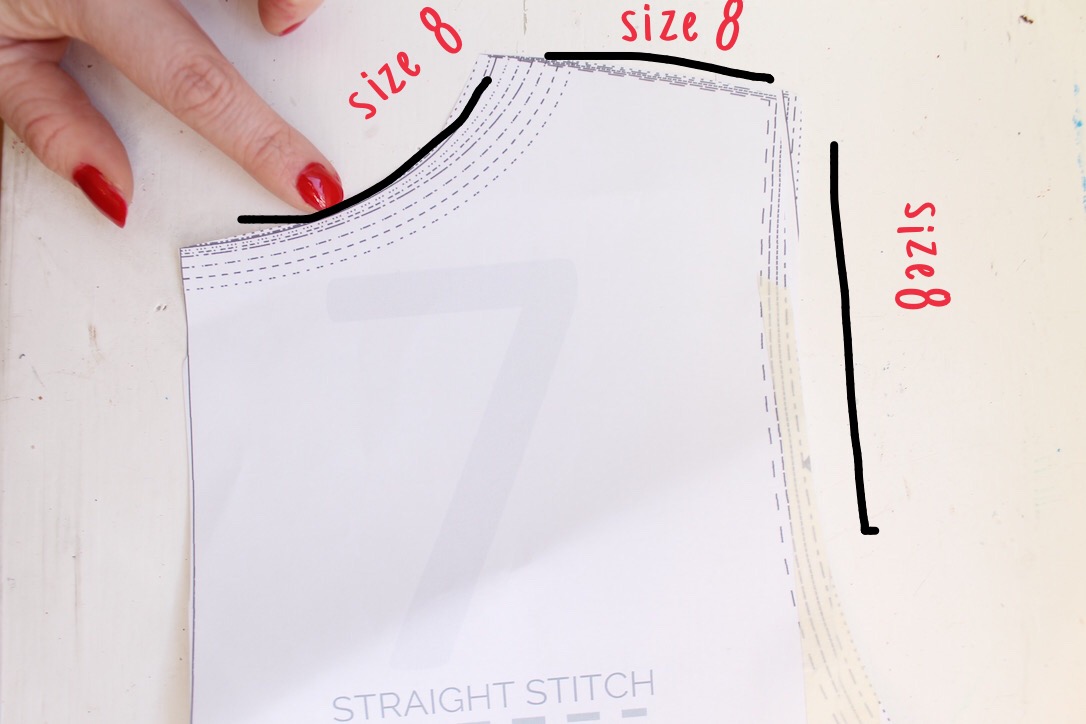
I took a few photos to help me explain because I am a very visual learner. I’m going to write out what I did, but seriously just look at the photos and hopefully that will help more than anything.
For the shoulders, and neckline I just did a straight 8. On the armscye I start at an 8 at the top of the shoulder but once I get down to the armpit I don’t stop at 8 I keep going out until I get to the full bust size. I do the same thing on the sleeves. Cut it as though you are cutting the size for your high bust but as you get the the bottom of the armscye keep going to your full bust size. I then graded back down to an 8 as I went down the sleeve towards the wrist. You can make any grading adjustments you need to as you go down the sides of the bodice piece for your own measurements in your waist and hips.
If you have an even larger difference in the high bust and full bust you may want to stick with a number in the middle of the two for the arm scythe or else you may end up with some bulk or gaping fabric that isn’t needed around the arm pit, but you will want to be sure and immediately start grading out for the bust to get to your full bust measurement.
I hope that is helpful! If you have other questions I highly recommend joining Kim’s facebook group, I am active in it as well as many others that are familiar with her patterns and are always willing to help out a fellow sewist 😉 You can also find me on Instagram @bluehousejoys or at my blog bluehousejoys.com/blog
