

Okay all you ladies with a baby belly I have a really fun post for you today. There are no more babies joining the Paynes so I had to enlist the help of a new sewing friend, Holly, who has the cutest baby belly. I met Holly only a few short weeks ago when she was helping me test the Montlake pattern and I knew instantly we would be great friends. She graciously agreed to help me show all of you how you can easily modify the Montlake tee to be maternity friendly.
Hi Straight Stitch Readers! I am SO GRATEFUL to Kimberly for having me today to share about my Maternity Montlake(s). This was actually my first foray into pattern testing, and I loved every minute.
I have a lot of strong preferences about my clothing. I love color and pattern, and I know what looks good on my body. When pregnant, I prefer my tops to be longer. I don’t have much of a tush to speak of, and it just stays all flat while my belly grows. So I like for my derriere to be covered while I show off my burgeoning belly.
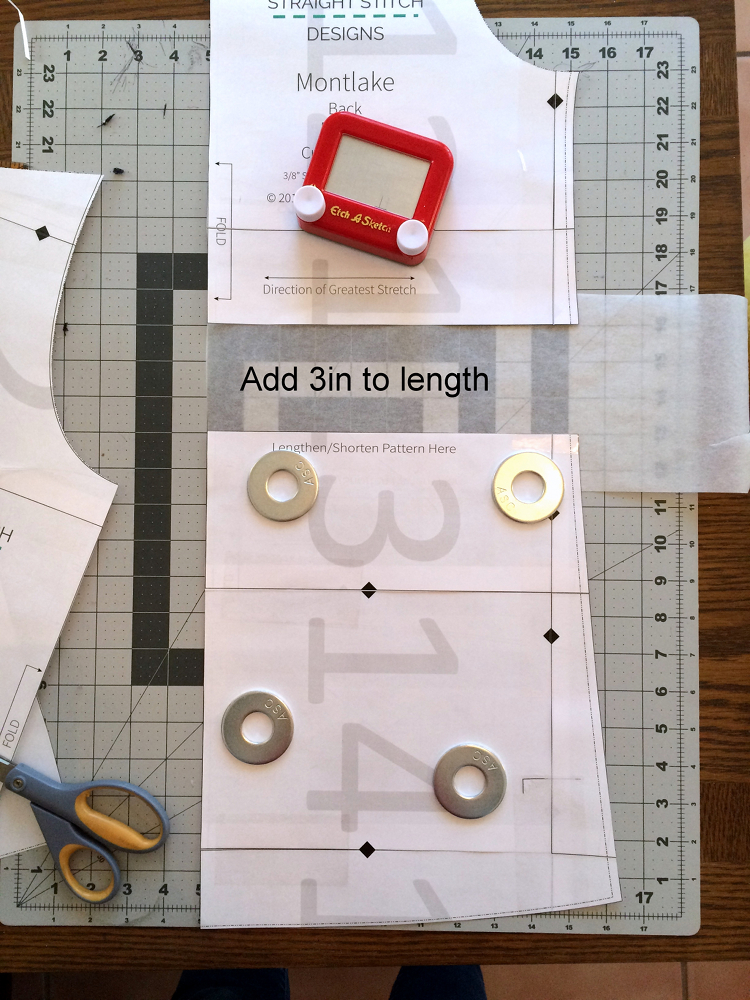
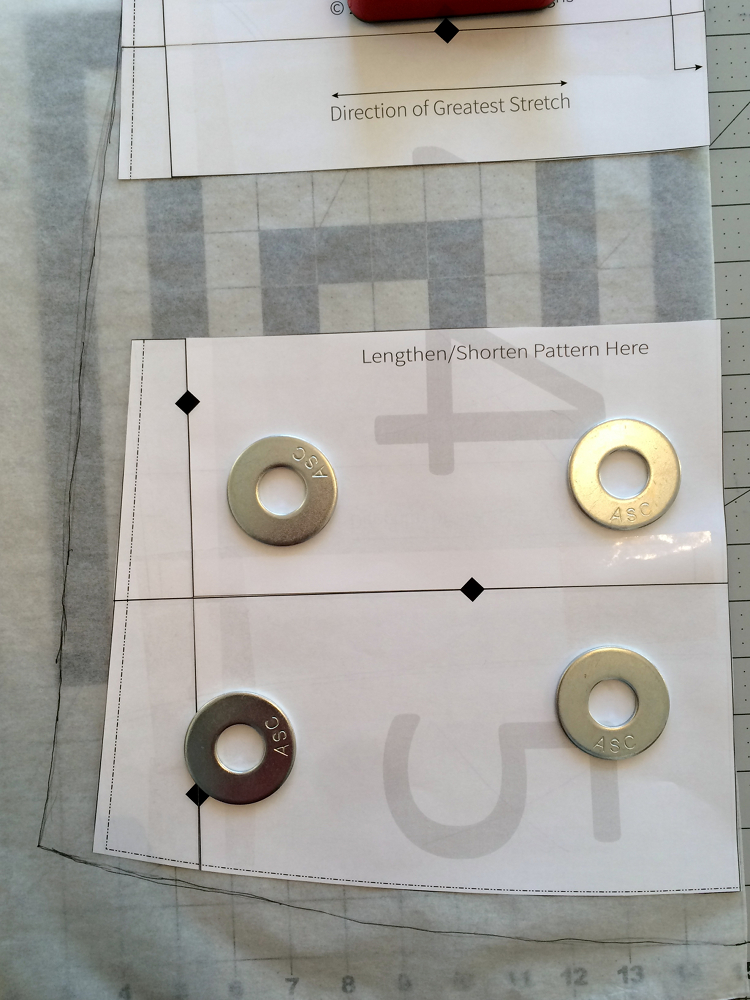
As I set out to make Maternity Montlakes, it turned out to be fairly simple alterations to an already fabulous pattern. For the back, I just added 3″ at the lengthen/shorten line. If you don’t like your maternity shirts long, you could always just add 1″ to the length. I do recommend adding some length, however, as maternity shirts do need a little extra length to them.
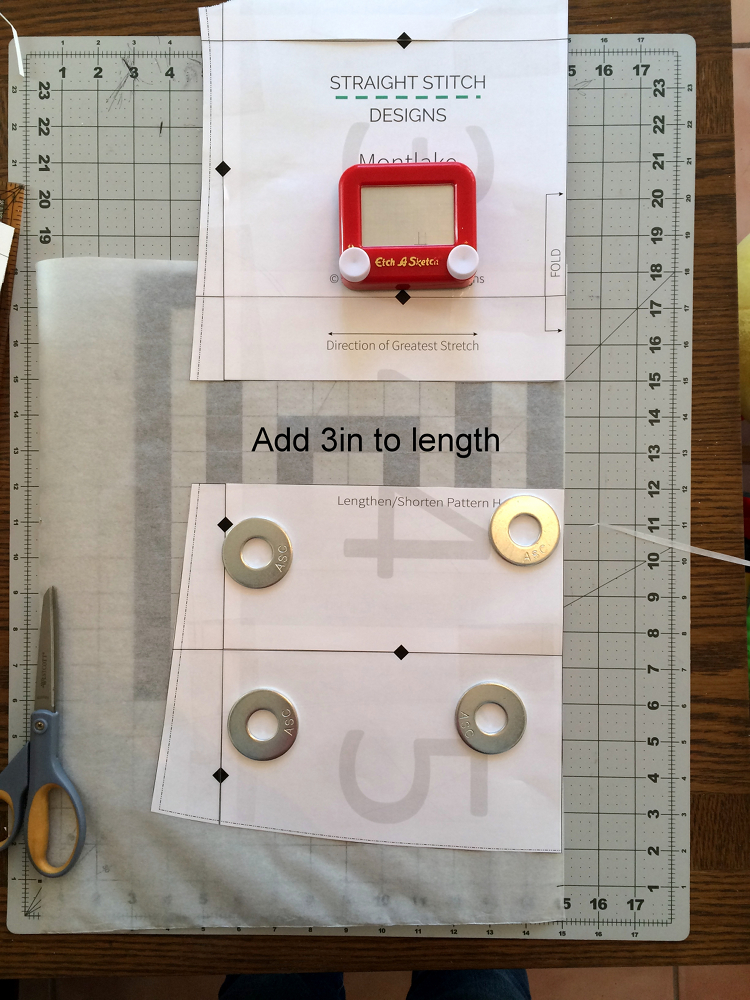
Then, I set out to alter the front. First, I added my 3″ at the lengthen/shorten line.
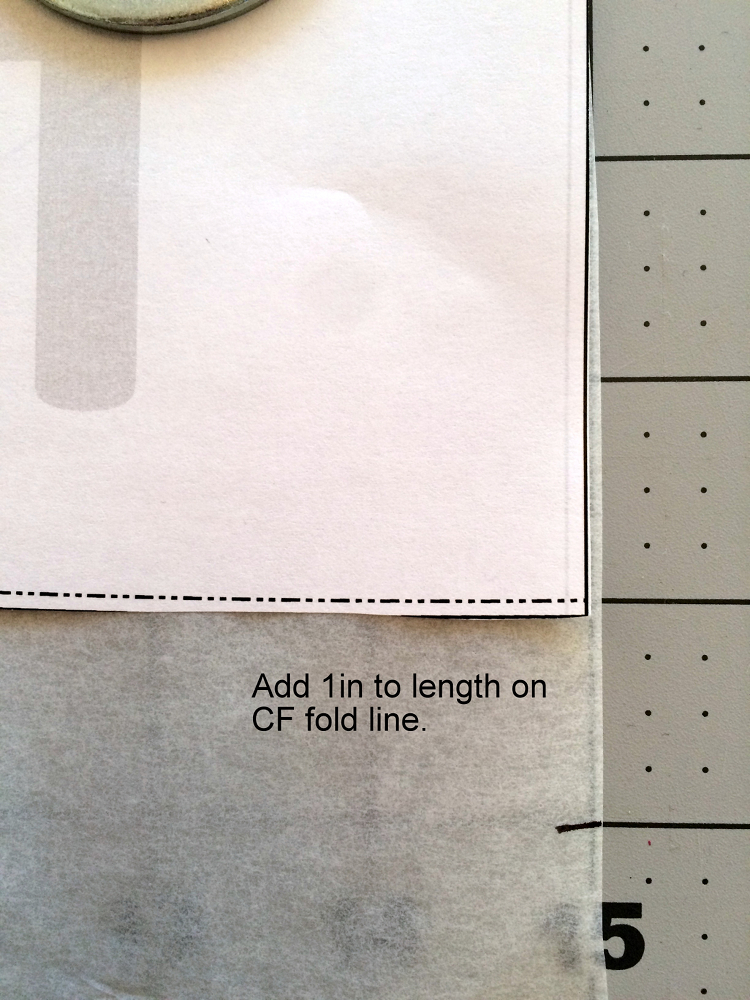
Now is when we work our magic. A common mistake people make is not realizing that you need more than just extra width for maternity clothes. That belly creates the need for extra length in the middle, also. So I marked an extra 1″ at the front center of my pattern at the fold line. I made the mistake of NOT adding this extra length to the middle front for my first one, which resulted in a high-low hem that I’m just pretending was intentional.
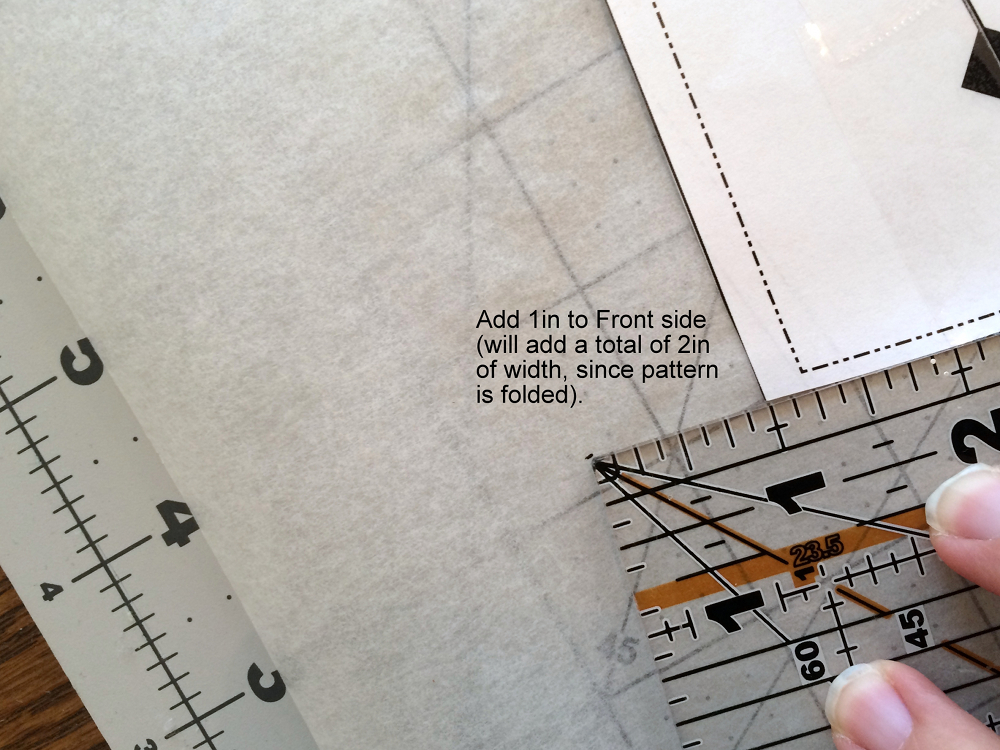
Next, we will be adding 1″ to the front piece along the side seam. (Note that this will be add 2″ to the total width of the pattern piece, as it’s folded). Mark 1″ out from the side seam on the front piece following the curve. I follow the curve because when I blend the lines, this will create the same side length to line up with the back piece.
Then, I do a simple connect the dots. Please pardon my wonky lines … evidently I cut straighter than I draw. Then, new pattern pieces! From there, just cut up and sew as instructed!
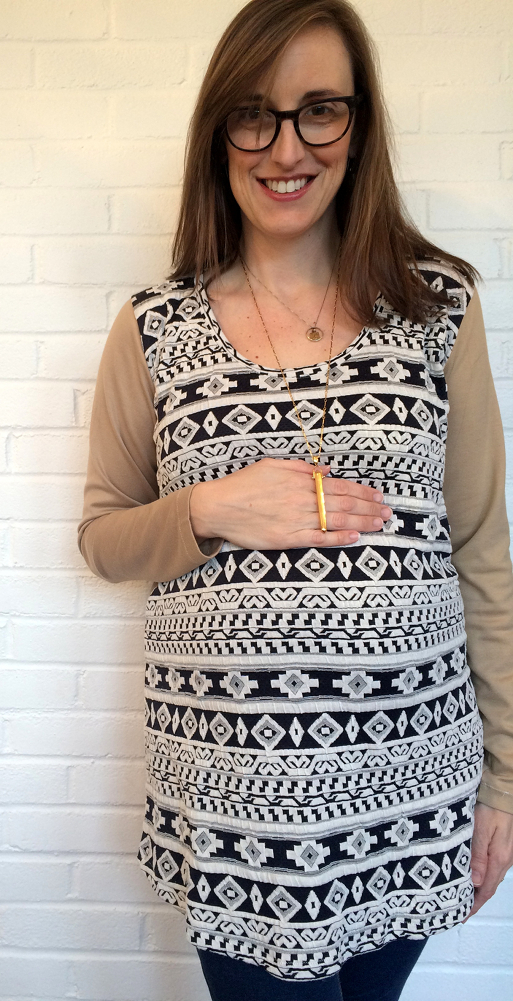
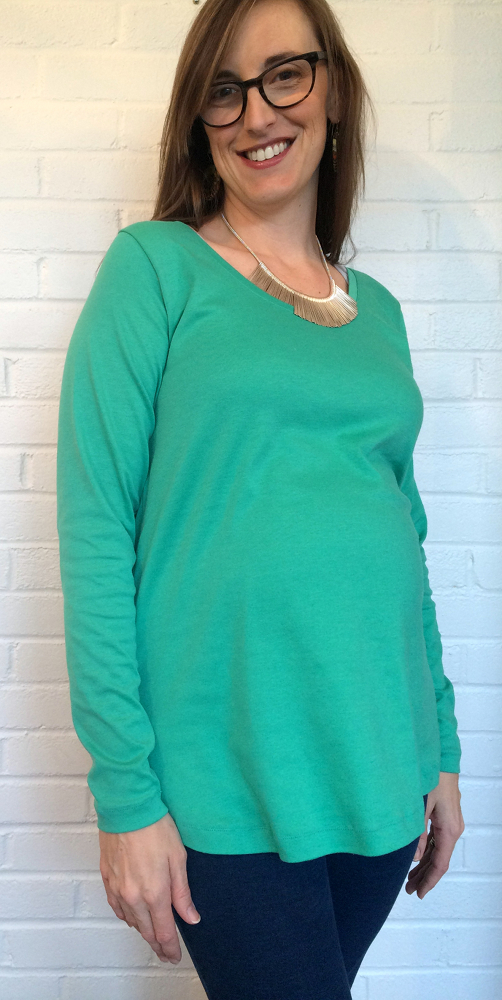
I made three of these puppies with these alterations. The first two were sewn up on a particularly chilly weekend here in Oklahoma, so they were made out of double knit with a nice hand, but not much drape. I luuurve them … very cozy.
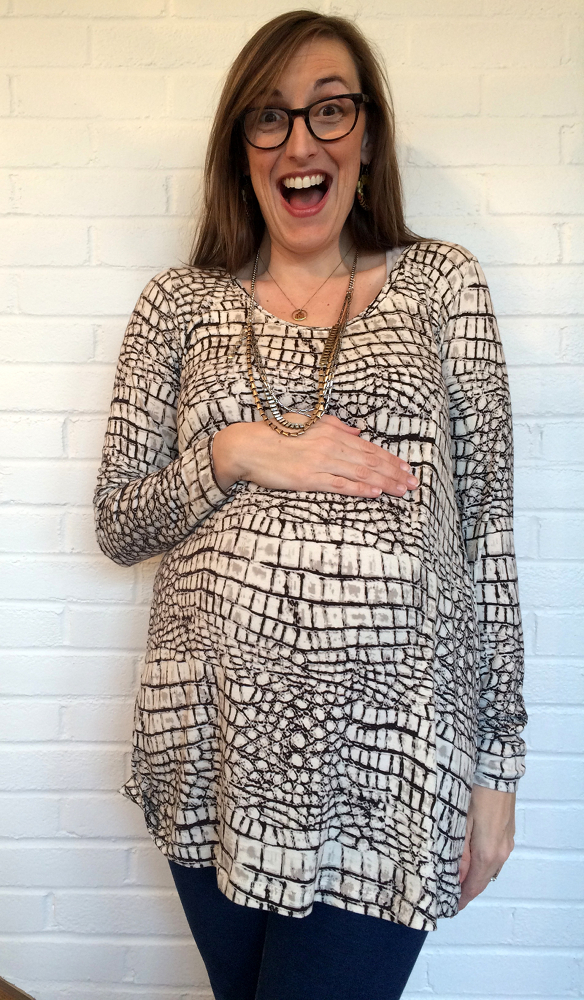
On Monday, I whipped up this third top in an awesome viscose/spandex four way knit I got on clearance from fabricdepot.com during a Black Friday promotion. Because of its drape and stretch, it definitely lays differently than the first two. But I love it also. Because, seriously, who doesn’t need a snakeskin print maternity tunic?!?!?
Thank you so much Holly for sharing with us how this pattern can work so well for a baby belly with just a few modification!
